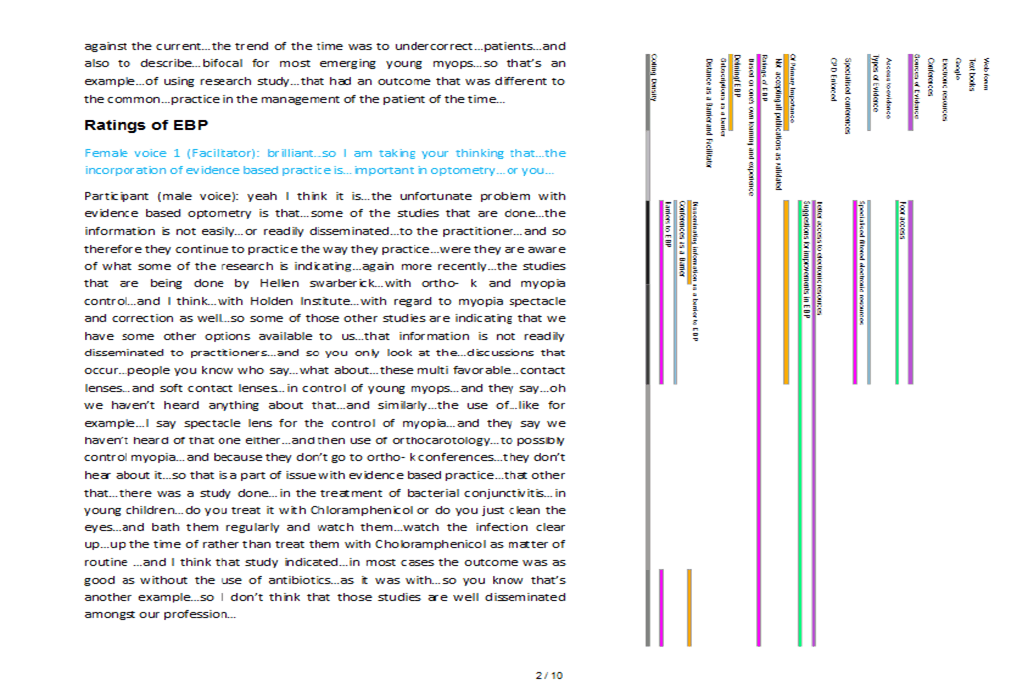
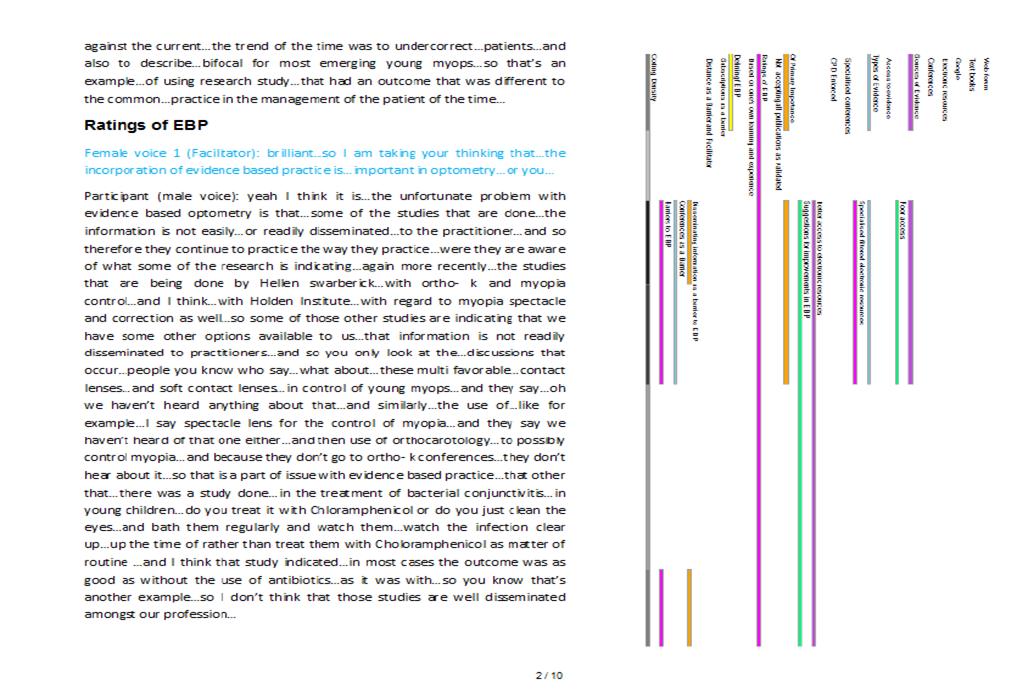
Printing coding stripes from NVivo 7, 8, 9 or 10 has long since been a source of complaint from users of this website. We are promised a report to make this possible and EASY with the release of NVivo 10 scheduled for June, 2012. I really hope this proves to be the case because we spend a lot of time addressing this issue in the training workshops when really it’s a software design issue. One should not need training to get such basic information out of NVivo. The current situation is that you can print the coding stripes provided:
- You can fit the coding stripes you wish to display on a single page. If you have very densely coded transcripts then you can’t print the stripes beside the text because in print preview in NVivo, you will have a page of text followed by two pages of coding stripes making it impossible to display as demonstrated in our image.
- You have a printer that can print “2 up”.
So you open your transcript, go to print preview and you will see your coding stripes displayed on every second page. Then, having set your printer to print two pages at a time, you get something similar to our image.
However, what happens if you want to send this report electronically? You can’t :(.
Probably the easiest option is to use screenshots although I wouldn’t be fan of screenshots as appendices myself. The problem is getting an electronic copy is a bit convoluted. Personally, I think it’s worth the trouble for a good appendix but some people may not agree. If you think so, have a look at a sample copy of a couple of pages from one of my own projects done like this. Click here to see!
If you want to go with this:
- Open a good sample transcript
- Switch on the coding stripes and choose the ‘selected items’ option
- Browse to the group of codes you wish to display. You will notice that some nodes/codes are represented in bold whilst others are not. Only tick the nodes in bold. This will remove nodes that are not coded against the chosen transcript from the display and optimise the space on the left pane.
- Select file/print/print preview and ensure the coding stripes tick box remains checked
- You will see your stripes displayed on every second page as before
- Use the ‘zoom out’ tool in the toolbar to fix the page to fill the screen but allowing you to see all of the page
- Use the snapshot tool to select an image of the full page
- Open Word and set you page to landscape
- Paste the first page of the transcript into your new document
- Repeat steps 6, 7 & 9 to place coding stripes beside the text
- Repeat the steps to complete the sample transcript or the amount you wish to offer as an appendix.
As I say , it’s convoluted but it might be worth it for a decent appendix. Let us know if we can help! Post a question on the forum and we will respond within one working day – it’s free!

For earlier releases, the instructions above still apply 🙁